0x02 MiniPC.AirLAN
Air LAN 万物互联不是
大唐 MaxTang NX-N100
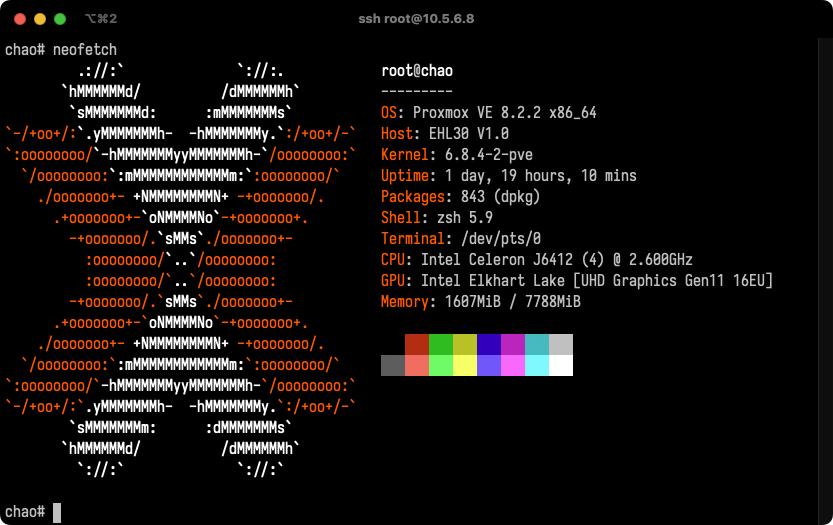
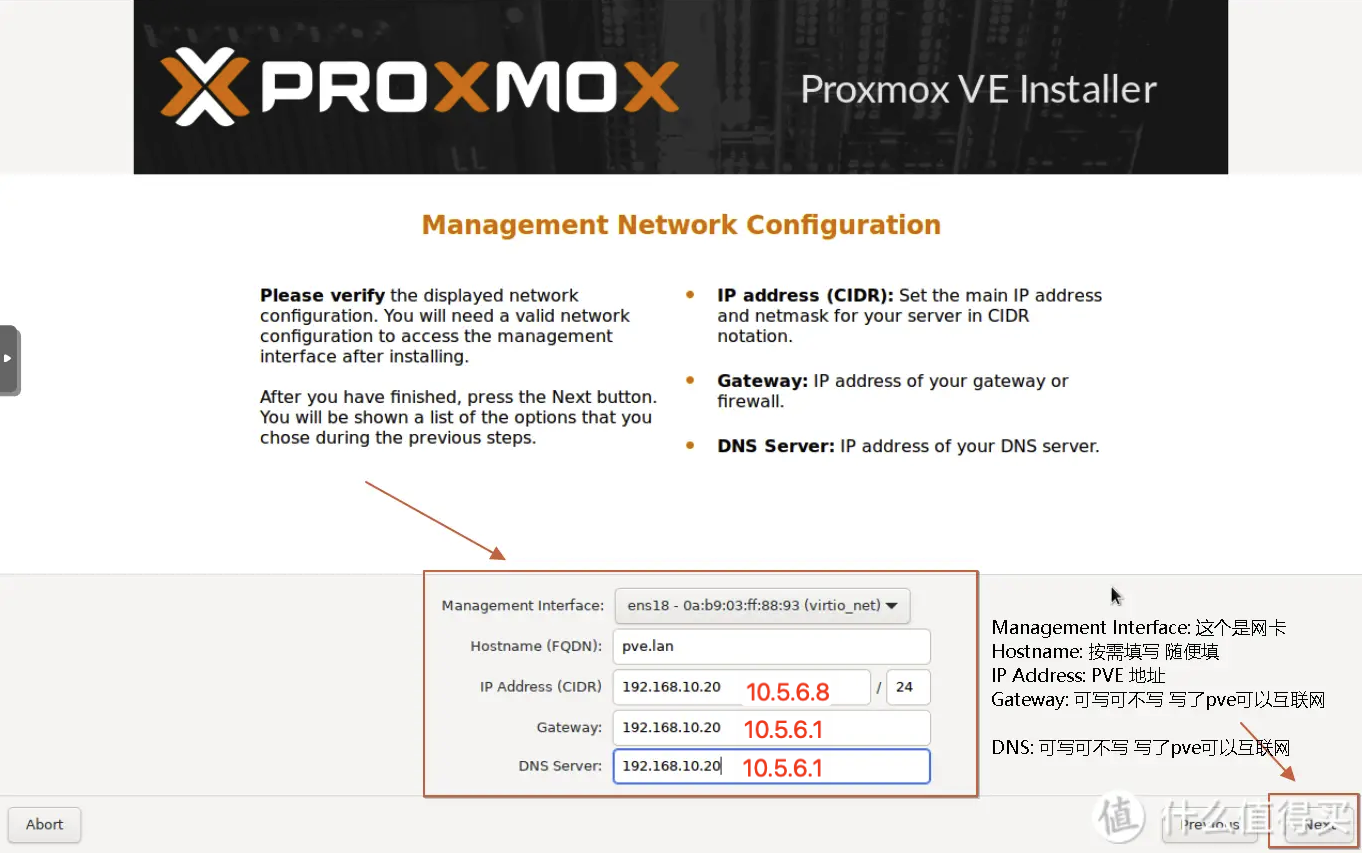
安装 PVE
安装最好接上网线, 这里有个张大妈的教程写的很详细 接上网线的好处就是在设置网络接口的界面, 就可以直接指定IP了, 红色是根据我的方案的设置
更详细的指南 & linux 基本命令解释
老版本里面有比较啰嗦的 更详细的指南 与 linux 基本命令解释
- 下载 ISO 镜像文件
- 制作启动盘 Ventoy
- 有线安装
- BIOS 修改 U 盘启动
有线网络配置参考 /etc/network/interface
auto vmbr0
iface vmbr0 inet static
      address 10.5.6.8/24
      gateway 10.5.6.1
      bridge-ports en0sp1
      bridge-stp off
      bridge-fd 0
WiFi 连接 (无法桥接, 非常不推荐)
apt install wpasupplicant -y/etc/network/interface
auto wlp3s0
iface wlp3s0 inet dhcp
      # address 10.5.6.8/24
      gateway 10.5.6.1
      wpa_conf /etc/network/wifi.conf
/etc/network/wifi.conf
ctrl_interface=/var/run/wpa/supplicant #运行位置
update_config=1 #允许在运行中由进程自动修改配置

network={
  ssid="WiFi"
  psk="XXXXXX"
  priority=1 #优先连接
}
硬盘分区
fdisk /dev/sda
Command (m for help): n
Partition number (4-128, default 4):
First sector ($START-$END, default $START):
Last sector, +/-sectors or +/-size{K,M,G,T,P} ($START-$END, default $END):
> w

mkfs.ext4 /dev/sda4
mkdir /home/cloud && chmod -R 755 /home/cloud
/etc/fstab
/dev/sda4 /home/cloud ext4 defaults 0 0
# mount -a && systemctl daemon-reload
提权配置, 需要哪个配哪个
不要配置到模版中去,先克隆,再进行配置
# 移除容器安全配置 docker 需要
+lxc.apparmor.profile: unconfined
+lxc.cap.drop:
+lxc.cgroup.devices.allow: a
# 开放 tun 给容器 9:200 来自 ls -l /dev/net
+lxc.cgroup1.devices.allow: c 10:200 rwm
+lxc.mount.entry: /dev/net dev/net none bind,create=dir
# 开放显卡给容器 225:0 和 226:128 来自 ls -l /dev/dri
+lxc.cgroup1.devices.allow: c 226:0 rwm
+lxc.cgroup1.devices.allow: c 226:128 rwm
Air LAN <LXC OpenWRT> 的安装
使用官方 OpenWRT 镜像, 承担了三个重要的功能
- 透明路由中继
- SMB 服务器
- 外网访问 tailscale
为什么不用虚拟机以及为什么不用 alpine
LXC CT容器的优点:
- 资源利用率高
- 直接使用宿主内核及硬件,效率高
- 温度,机型等硬件等系统信息直接显示
很多都是路由而非应用, 直接op 可以减少很多配置
alpine 的 smb 配置有奇怪的问题 (windows 可以发现, 但无法连接), 不如 op 直接 LuCI 方便
下载 rootfs.tar.gz 镜像或者 OpenWRT常规img.gz转化为PVE LXC CT模版rootfs.tar.gz及简单LXC OP的安装与基本设置以旁路由模式为例
以清华镜像站的为例, 以下命令在宿主机的 shell 中执行
wget https://mirrors.tuna.tsinghua.edu.cn/openwrt/releases/23.05.4/targets/x86/64/openwrt-23.05.4-x86-64-rootfs.tar.gz
pct create 110 ./openwrt-23.05.4-x86-64-rootfs.tar.gz --rootfs \
   local-lvm:2 --ostype unmanaged --hostname OpenWRT \
   --arch amd64 --cores 1 --memory 512 --swap 0 \
   -net0 bridge=vmbr0,name=eth0 \
   -net1 bridge=vmbr1,name=eth1
完整配置如下
/etc/pve/lxc/110.conf
arch: amd64
cmode: shell
cores: 1
features: fuse=1,mknod=1,mount=nfs;cifs,nesting=1
hostname: AirLAN
memory: 512
mp0: /home/cloud,mp=/cloud
net0: name=eth0,bridge=vmbr0,gw=10.5.6.1,hwaddr=BC:24:11:E7:9B:81,ip=10.5.6.10/24,type=veth
net1: name=eth1,bridge=vmbr1,hwaddr=BC:24:11:8E:6F:7E,type=veth
ostype: unmanaged
rootfs: local-lvm:vm-110-disk-0,size=2G
swap: 0
lxc.apparmor.profile: unconfined
lxc.cap.drop:
lxc.cgroup.devices.allow: a
lxc.cgroup2.devices.allow: c 10:200 rwm
lxc.mount.entry: /dev/net dev/net none bind,create=dir
pct start 110 启动!
OpenWRT 透明路由/中继模式配置
在 PVE 管理后台中进入 OpenWRT 命令行, 用户名 root, 密码看各自文档, 官方版没有密码, 直接回车
NOTE
中继模式是指: openwrt 只是将两个网口的设备链接起来, ip 的下发和管理都还是主路由来控制, 这样对于上下游的路由器和设备来说, openwrt 这里是透明的
修改 /etc/config/network 文件配置
config interface 'lan'
        option proto 'static'
        option ipaddr '10.5.6.10'
        option dns '10.5.6.1'
        option gateway '10.5.6.1'
        option netmask '255.255.255.0'
        option device 'br-lan'

config device
        option name 'br-lan'
        # 下面三行是两个网口中继的配置
        option type 'bridge'
        list ports 'eth0'
        list ports 'eth1'
修改保存之后, service network restart 或者 直接 reboot 重启就好了
如果配置成功的话, 这时候就能够在小米路由器的管理后台看到 网线联网设备新增了三个
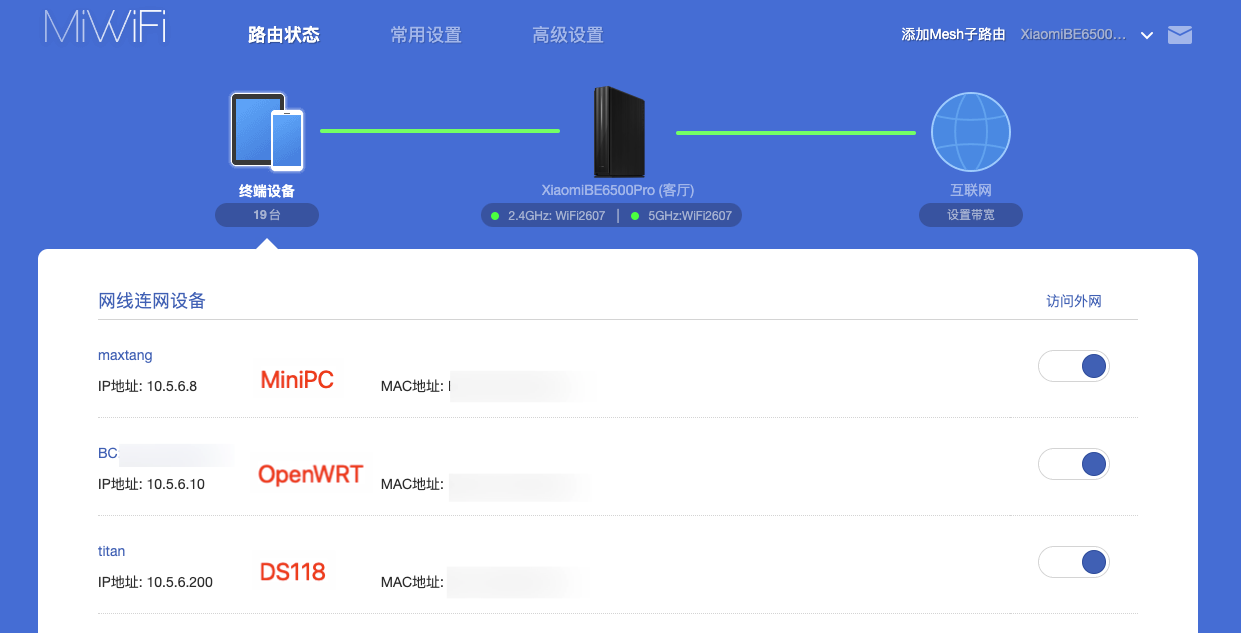
重启之后, ip addr 查看下ip信息, 之后就可以通过浏览器来访问 OpenWRT LuCI 界面了.
# 更新软件源
sed -i 's_downloads.openwrt.org_mirrors.tuna.tsinghua.edu.cn/openwrt_' /etc/opkg/distfeeds.conf
opkg update
SMB 服务器
可以方便的在局域网共享文件
# 安装工具包
opkg install samba4-server luci-app-samba4 wsdd2 shadow

# 需要先添加系统用户, 才能加入到 smb 用户
useradd -u 1001 -s /usr/sbin/nologin -M cloud
useradd -u 1002 -s /usr/sbin/nologin -M tv
smbapasswd -a cloud # 根据提示输入用户名密码
smbapasswd -a tv # 根据提示输入用户名密码
#  smb 服务设置为开机自启
service samba4 enable
#  smb 服务 立即启动
service samba4 start
#  windows 网络服务发现服务设置为开机自启
service wsdd2 enable
#  smb 服务 立即启动
service wsdd2 start
Services -> Network Shares 可视化的 smb 配置要友好的多了
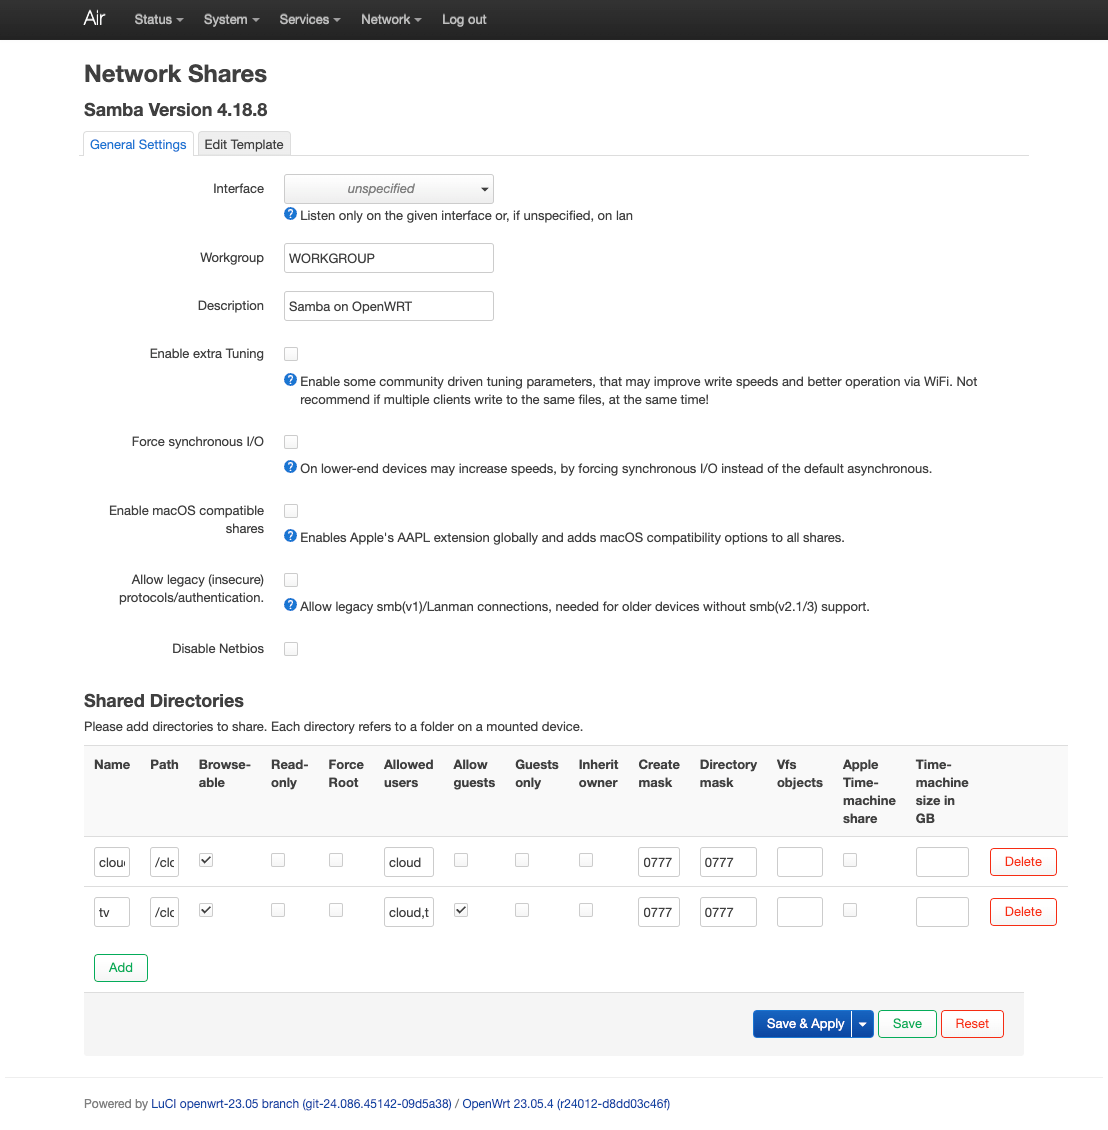
关闭DHCP
不然他会劫持主路由的 DHCP, 点击右上角 Delete 然后 Save & Apply 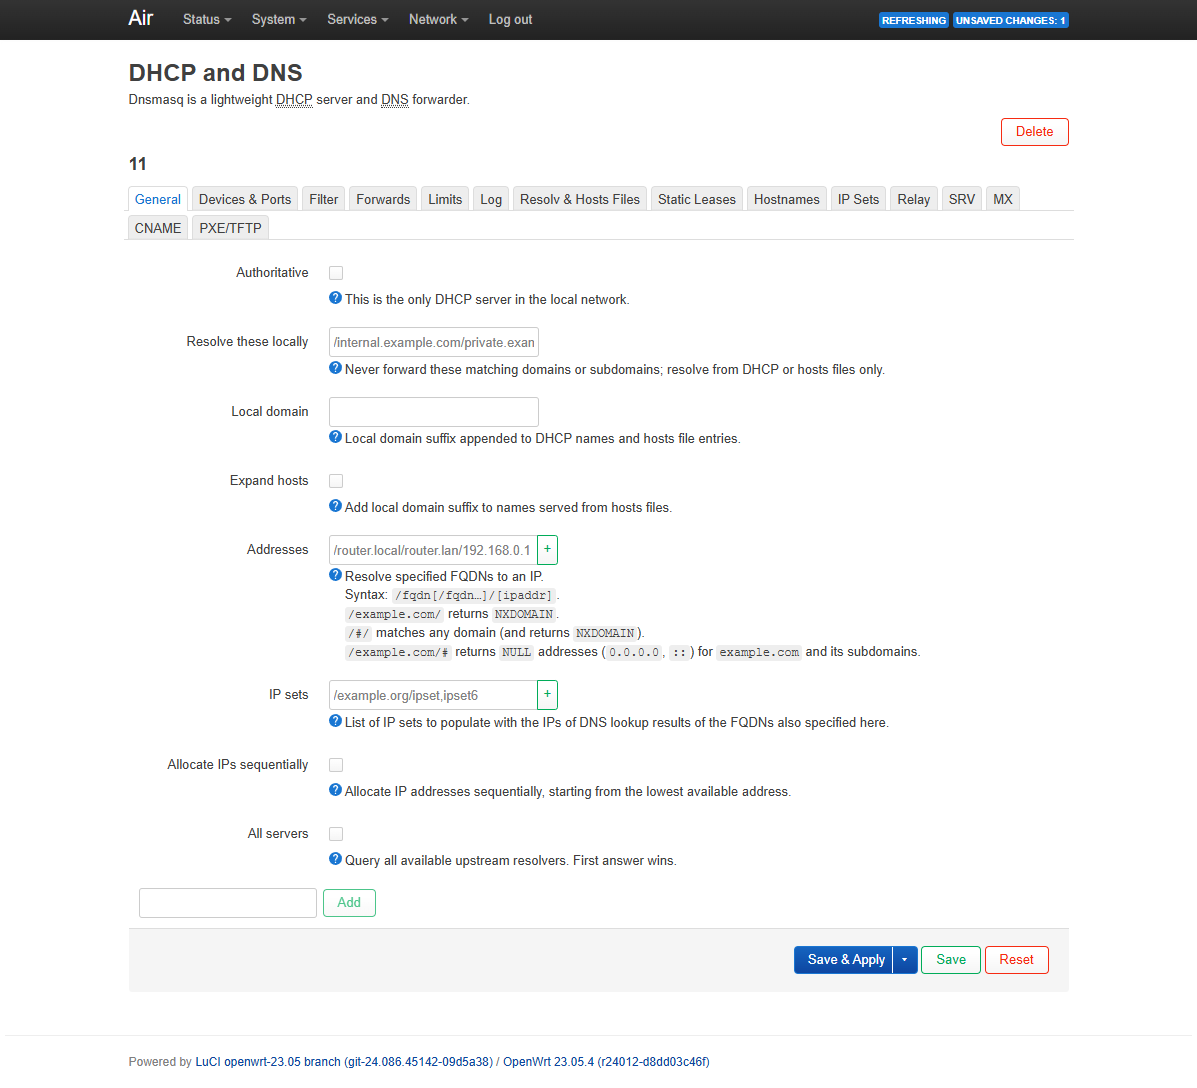
tailscale
简单来说, tailscale 是一个基于 WireGuard® 的 VPN 服务, 可以在公网设备和家里局域网之间打洞. 了解更多可以查看官网 https://tailscale.com
opkg install tailscale
tailscale update
service tailscale enable
service tailscale start

# 首次需要打开链接登录, 后续就不用了
tailscale up --advertise-exit-node  --advertise-routes=10.5.6.0/24 --reset
有问题的话, 可以通过手动运行 tailscaled 命令查看 log 来排查
之后再 tailscale 的 Admin console WEB 页面开启 子路由和退出节点 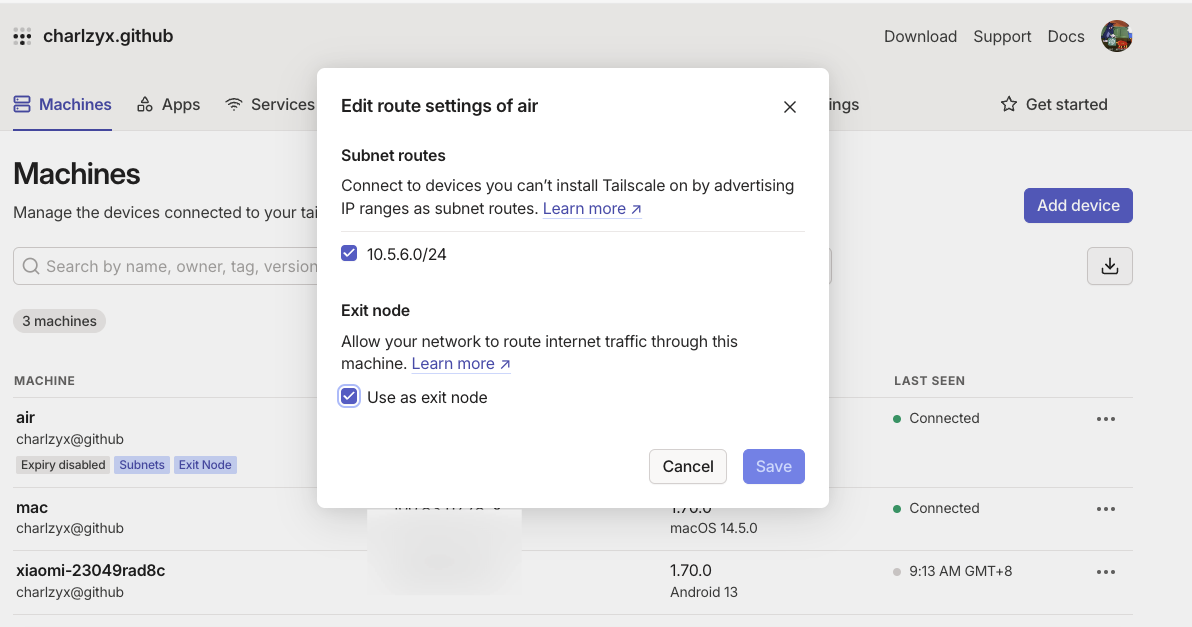
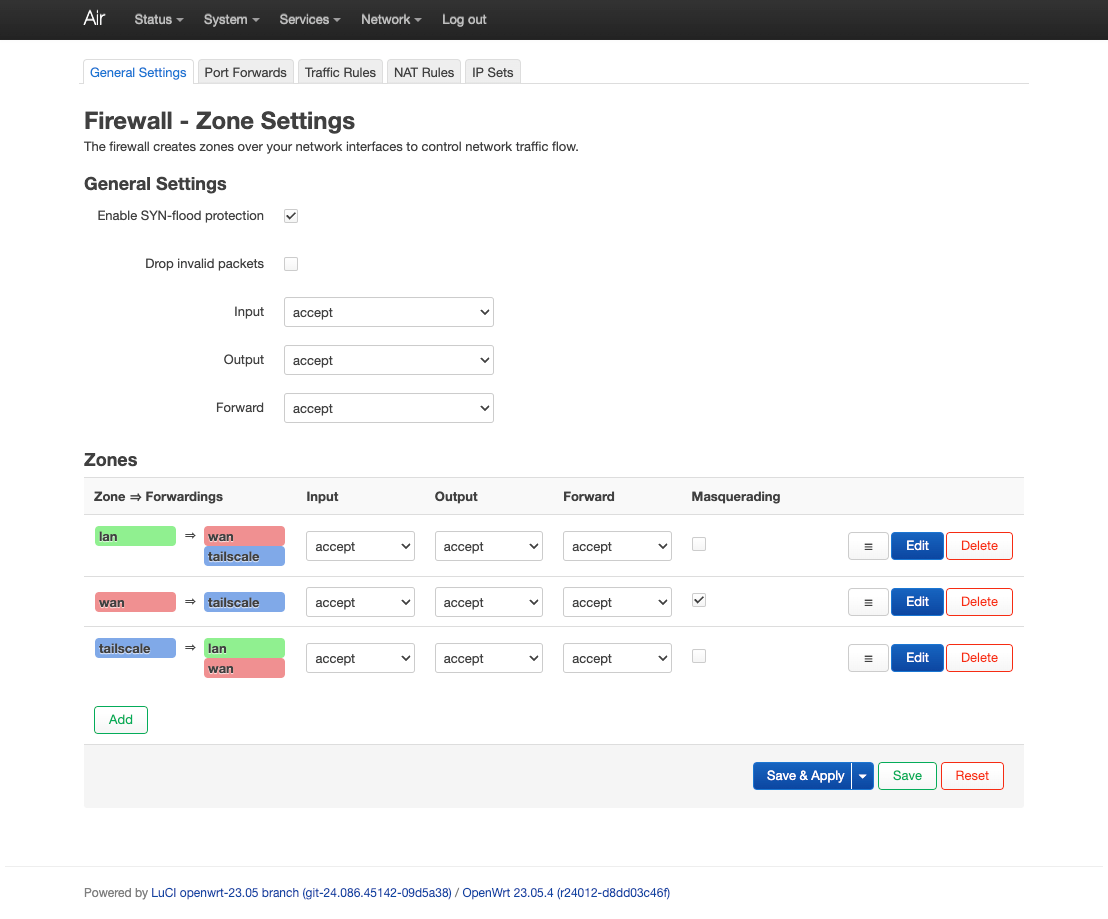
别忘了在 OpenWRT 中开放防火墙
成功的话, 就可以在安装 tailscale 客户端, 并开启 VPN 链接的情况下, 在公网使用局域网ip网段 10.5.6.0/24 进行访问了, 就像这样
~ » tailscale ping 10.5.6.10                                           chao@mac
pong from air (100.101.102.103) via DERP(tok) in 243ms
pong from air (100.101.102.103) via DERP(tok) in 245ms
--------------------------------------------------------------------------------
~ » tailscale ping 10.5.6.1                                      130 ↵ chao@mac
pong from air (100.101.102.103) via DERP(tok) in 245ms
pong from air (100.101.102.103) via DERP(tok) in 246ms
pong from air (100.101.102.103) via DERP(tok) in 240ms
--------------------------------------------------------------------------------
~ » tailscale ping 10.5.6.200                                    130 ↵ chao@mac
pong from air (100.101.102.103) via DERP(tok) in 241ms
pong from air (100.101.102.103) via DERP(tok) in 242ms
pong from air (100.101.102.103) via DERP(tok) in 242ms
当然 tailscale 其实提供了多种访问方式, 另外还有 tailscale serve / tailscale funnel 将本地映射到公网之类的高级功能, 可以自由探索一番
如果要安装在小米路由器上的话, 略微有亿点点困难
如何安装到小米路由器上
官方给的安装脚本并不能直接运行, 因为小米路由器就算破解了 ssh, 但不能像常规的 openwrt 一样自由的安装软件与配置;
以我手上的 6499PRO 为例, /etc/ 目录是会在每次重启之后清空的, 只有 /data/other 留有100M左右空间;
不提废话, 开搞!
-1. ssh 登录
通过 ssh 链接小米路由器 ssh root@9.5.6.1 , 执行官方安装命令会有如下报错, 有用的信息是 这个链接 https://pkgs.tailscale.com/stable/#static 和 LEDE_ARCH="aarch63_cortex-a53_neon-vfpv4"
curl -fsSL https://tailscale.com/install.sh | sh 输出结果
root@XiaoQiang:~# curl -fsSL https://tailscale.com/install.sh | sh
Couldn't determine what kind of Linux is running.
You could try the static binaries at:
https://pkgs.tailscale.com/stable/#static

If you'd like us to support your system better, please email support@tailscale.com
and tell us what OS you're running.

Please include the following information we gathered from your system:

OS=other-linux
VERSION=
PACKAGETYPE=
UNAME=Linux XiaoQiang 4.4.213 #0 SMP PREEMPT Mon Mar 11 03:38:30 2024 aarch64 GNU/Linux

NAME="OpenWrt"
VERSION="17.06-SNAPSHOT"
ID="openwrt"
ID_LIKE="lede openwrt"
PRETTY_NAME="OpenWrt 17.06-SNAPSHOT"
VERSION_ID="17.06-snapshot"
HOME_URL="http://openwrt.org/"
BUG_URL="http://bugs.openwrt.org/"
SUPPORT_URL="http://forum.lede-project.org/"
BUILD_ID="unknown"
LEDE_BOARD="ipq52xx/generic"
LEDE_ARCH="aarch63_cortex-a53_neon-vfpv4"
LEDE_TAINTS="no-all busybox override"
LEDE_DEVICE_MANUFACTURER="OpenWrt"
LEDE_DEVICE_MANUFACTURER_URL="http://openwrt.org/"
LEDE_DEVICE_PRODUCT="Generic"
LEDE_DEVICE_REVISION="v-1"
LEDE_RELEASE="OpenWrt 17.06-SNAPSHOT unknown"
- 0. 手动下载二进制文件
cd /data/other
wget https://pkgs.tailscale.com/stable/tailscale_0.70.0_arm64.tgz
tar -xvf ./tailscale_0.70.0_arm64.tgz
mv tailscale_0.70.0_arm64 tailscale
- 1. 编写启动脚本 /data/other/tailscale.procd
添加可执行权限 chmod 776 /data/other/tailscale.procd
#!/bin/sh /etc/rc.common

START=98
SERVICE_DAEMONIZE=0
SERVICE_WRITE_PID=0
PIDFILE=/var/run/tailscaled.pid

TAIL="/data/other/tailscale"
TAILD="/data/other/tailscale/tailscaled"

start(){
    $TAIL/tailscaled --cleanup
    start-stop-daemon -S -b -m -p $PIDFILE \
      -x $TAILD -- \
      --port=41640 \
      --state=$TAIL/tailscaled.state
  echo "tailscaled running..."
  ps | grep tailscaled
}

stop(){
  $TAILD  --cleanup
  start-stop-daemon -K -p "$PIDFILE"
  echo "killed tailscaled"
}

restart(){
  # 这里两个 advertise 参数就是能够让我们内网访问的重要参数
  ${TAIL}/tailscale up --advertise-exit-node --advertise-routes=9.5.6.0/24
}
-4. 编写自启动命令 /data/other/autorun.sh
添加可执行权限 chmod 776 /data/other/autorun.sh
#!/bin/sh

cp ./tailscale.procd /etc/init.d/tailscale
rm -rf /etc/rc.d/S98tailscale
ln -s /etc/init.d/tailscale /etc/rc.d/S98tailscale
echo 'alias tailscale=/data/other/tailscale/tailscale' >> /etc/profile
source /etc/profile
/etc/init.d/tailscale start
-5. 执行命令
/data/other/autorun.sh
service tailscale start
没有报错信息的话, 就可以正常使用 tailscale 命令了, 其中 子路由和 exit-node 功能 需要在 tailscale Admin console 开启
-6. 软固化
理论上可行, 还没验证
路由器重启会删除除了 /data/ 路径下的所有其他文件 比方说我们添加的 /etc/init.d/tailscale 文件, 所以利用一下 ShellCarsh 的软固化功能, 把我们的启动脚本放到 ShellCarsh 的软固化脚本里面执行一下
首先找到 ShellCrash 安装目录, 我的是 /data/ShellCrash, 修改 misnap_init.sh 这个文件, 在大概这个位置
	#软固化功能
	autoSSH
	#设置init.d服务
	cp -f $CRASHDIR/shellcrash.procd /etc/init.d/shellcrash
	chmod 754 /etc/init.d/shellcrash
	#启动服务
	if [ ! -f $CRASHDIR/.dis_startup ]; then
        ...
    fi
+   source /data/other/autorun.sh
小结
这样一个连接万物的 Air LAN 就配置好了, 下面我们看一下如何搭建一些常见的应用